

By Larry Barker
Previously, we have explored the topic of migrating our Teamstudio Export HTML-based Notes application archives to SharePoint sites using a few Microsoft based tools which have seen a few changes over the past couple of years. The approaches we’ve previously described are using SharePoint Designer and the Microsoft SharePoint Migration Tool (SPMT).
There have been a couple of changes that mean we need to update our recommendations for the process of importing your Exported databases into SharePoint. First, SharePoint Designer has now been deprecated. That approach had some limitations in any case, so most people will be using the SPMT option. However, changes to the SPMT mean that we need to update our instructions for that process. We will attempt to address those with an updated procedure by which you may get your Export archives up and running efficiently on your SharePoint tenants.
Preparing your SharePoint Tenant
Teamstudio Export uses the included indexsp.aspx files as landing pages for your archived Domino applications when hosted from a SharePoint document library. This requires a few tenant attributes to be enabled permitting the use of custom scripts. This may have already been set up within your environment but is worth checking should you skip to a later step and realize that your index.aspx files are not rendering correctly.
You will want to enable both the “Allow users to run custom script on personal sites” and “Allow users to run custom script on self-service created sites” options. You will likely need to switch your SharePoint Admin UI to “Classic Settings Page” to be able to see the two options but will find them on the “Settings” page of the SharePoint admin center. Be sure to discuss any changes and security ramifications with your SharePoint admins.

Be aware that this may take up to 24 hours to take effect, as per the Microsoft note above.
Preparing Your SharePoint Site
Whether you are planning to use an existing SharePoint site or a create a new one, you will need to verify that the ‘DenyAddAndCustomizePages’ attribute has been disabled. This may be verified and set via PowerShell in the following manner.
In order to verify the current status of ‘DenyAddAndCustomizePages’ you may need to install the SharePoint PowerShell module, and/or download and install the SharePoint Online Management Shell if you have not previously used PowerShell for SharePoint online tenant/site management.
Once setup and authenticated to your SharePoint tenant PowerShell session you may verify the setting with the following script.
Get-SPOsite https://ExampleTenant.sharepoint.com/sites/ExampleSite -Detailed | select DenyAddAndCustomizePagesBe sure to amend your URL and Site details to match the site from which you are planning to host your Export HTML Archive. If the attribute returns as ‘Disabled’ you may proceed to migrating your archive data to your site in the next step.

DenyAddAndCustomizePages property verified as disabled.
However, if the attribute returns as ‘enabled’ you will need to disable the setting for the site with the following, again swapping out your own tenant/site details as required:
Set-SPOSite -Identity https://ExampleTenant.sharepoint.com/sites/examplesite -DenyAddAndCustomizePages $falseYou may check that the attribute has now been disabled by using the previous PowerShell command just to be sure it has been applied correctly.
Important Note: Be sure to make this change prior to uploading/migrating your archives to your SharePoint site. We have noticed a change over the past few months where in some cases if you apply the setting to enable the aspx index usage against an existing archive hosted in a document library, the new settings do not propagate across existing files and you will need to reupload the indexsp.aspx file for it to inherit the new site settings.
Migrating your Domino HTML Export Archive
For this step we will use the Microsoft SharePoint Migration Tool (SPMT). Capable of migrating older on-premises SharePoint sites to SharePoint Online, it may also be used to move websites from local file shares or folders to a new or existing SharePoint site document library and may be more appropriate for larger archives that you are reluctant to migrate using browser based file transfer sessions. Or, perhaps if you do not want to go through the trouble of creating some PowerShell scripts to get the job done for you.
At this point we will assume that you have either already archived your application with Teamstudio Export, or are familiar with the process.
Once setup, the process of using SPMT is fairly straightforward. The tool authenticates directly with the destination tenant and walks you through selecting source and destination site collections.
When prompted, authenticate with the SharePoint tenant using at a minimum a Site Collection administrator account on the target SharePoint site.

Select ‘Start a new migration’ or, if performing a larger, more involved migration, you may want to explore using the Migration Manager and multiple nodes/agents to scale the tasks.

Choose ‘File share’ as the intended content source.

At this point you will be asked to select what files you would like to migrate. In the case of an Export HTML-based archive you will want to select the top level folder of your desired application. Leave the option for “Migrate selected folder and folder contents” selected.

Choose your target O365 service. Select SharePoint as the destination.

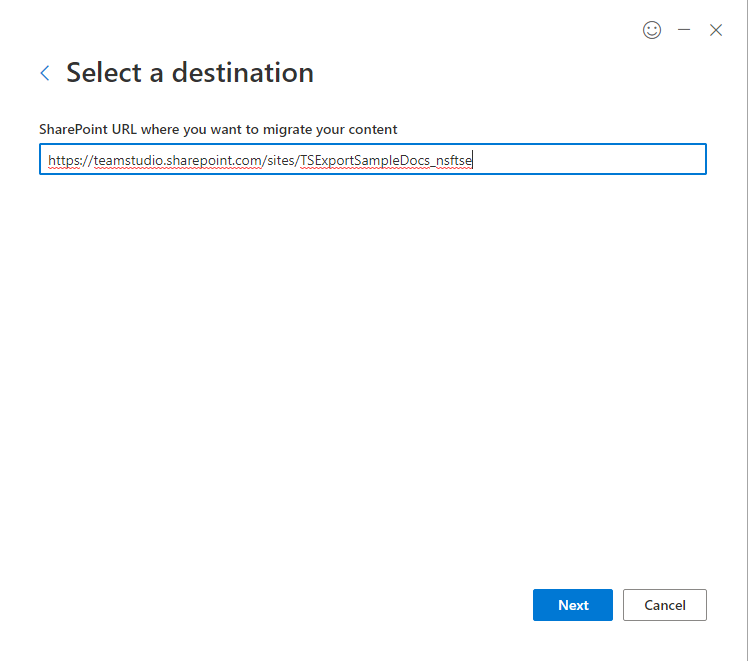
Here you will need to change the auto-populated SharePoint URL with the Site name you previously set up under “Preparing Your SharePoint Site.” If you leave this as default a new site will be created and your archive will be migrated. However, your indexsp.index landing page will fail to operate correctly and will likely initiate a file download request upon launch.
Next, you will be asked the location to which you want to migrate your files. Set the Location to Documents, create a new library and select “Next”

Name your Migration task and select “Next”. You may also at this point select additional HTML archives to export using the “Add another migration” feature.

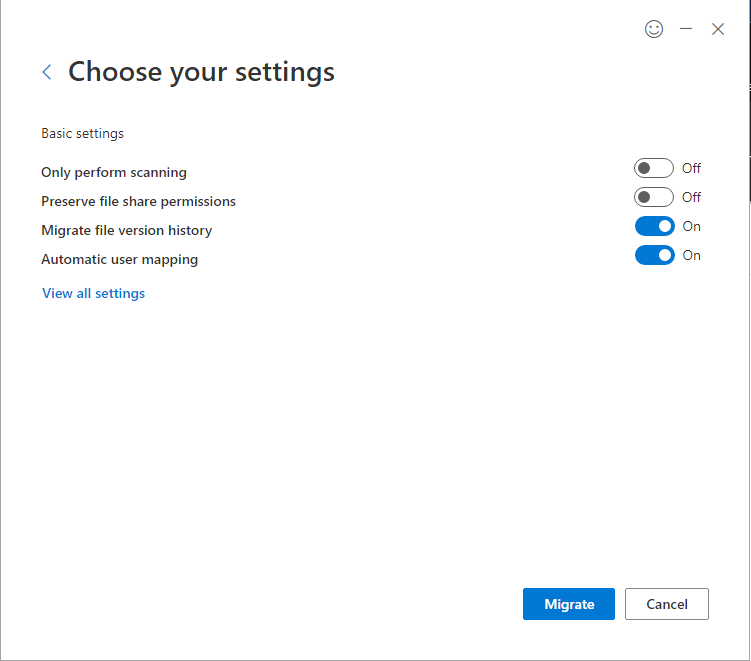
In our example we leave the settings on this tab as default and select the “Migration” button.
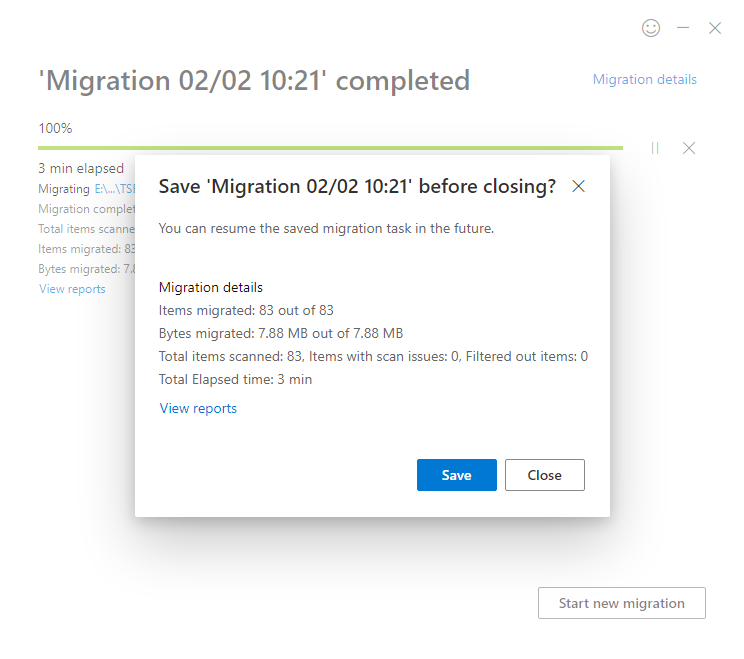
The migration will launch and once completed will present you with a notification allowing you to close or save the task or investigate any reports that may be of interest.
For an estimate as to the length of time it may take to upload your Export HTML archives you may refer to the bottom of the page of our earlier post on the topic.
Viewing Your New Archive
Once the migration task is completed by SPMT you will be able to find your new folder within the SharePoint Site contents. If you open up your application’s self-contained HTML Export folder you will notice the inclusion of the indexsp.aspx file that is intended for use as a landing page for your application when hosted from any SharePoint site document library. You may then distribute links to your archived Notes applications for use by your end users.

Important Note: If you attempt to open your indexsp.aspx landing page and it offers to download it versus rendering within your browser, you will need to go back to the initial steps to set your “DenyAddAndCustomizePages” site property as detailed earlier or explore other troubleshooting steps similar to what we reference below under “Additional Migration Issues”
Accessing SharePoint Migration Tool Reports
The SPMT application generates log files, summary and task level reports to help you manage, audit and troubleshoot the migration process. They are accessible at various points through the migration wizard including a ‘View Reports’ link on the Migration notification upon completion. For further information specific to reporting please see Microsoft’s SPMT reporting usage documentation.

Additional SharePoint Migration Issues
We have come across a few other occasions when customers’ indexsp.aspx files would not render and simply offered to download like any other stored file from the Document Libraries. One known solution is to run the following PowerShell to connect to your site and attempt a quick fix.
Connect-PnPOnline -Url https://contoso.sharepoint.com/sites/permissive -VerboseGet-PnPFile -Url /sites/permissive/html/newfile.aspx -Path c:\temp -Filename newfile.aspx -AsFileThis may be used as a workaround to resolve a known issue that may occur with aspx files. The issue is that the first time they are accessed, they open incorrectly, prompting a download/data transfer session instead of opening within the browser. This PowerShell script will download the file, counting as the initial access or first attempt so when it is accessed the second time it opens correctly. There are additional scripts on the following link that can also remediate an entire site collection with this issue here.
If your issue persists it may be worth logging a support ticket with Microsoft at that point or notifying your SharePoint/O365 Administrators.
If you have questions or comments about this process, feel free to contact us via email at techsupport@teamstudio.com.