

By Larry Barker
Welcome back to our ongoing series on deploying HCL Domino applications using Build Manager and other CI/CD tools. In our previous articles, we have discussed the fundamental aspects of deployment, examined the development of deployment pipelines, and explored advanced release strategies. Today, we aim to extend our understanding further as we look into the automation capabilities of Build Manager's command line features, and integration with Ansible for a hybrid approach to deploying new application builds.
For those new to our series or in need of a refresher on the features of Build Manager, we recommend you review the following:
Deploying HCL Domino Applications with Build Manager: Our introductory post to the series, where we break down the basics of using Build Manager for HCL Domino application deployment.
Advanced Deployment with Build Manager: A deeper exploration of Build Manager, focusing on more advanced deployment strategies.
Building Pipelines for HCL Domino Application Deployment: This article provides an in-depth look at developing efficient and robust deployment pipelines for HCL Domino applications.
In this post, our focus will be:
Gaining an understanding of Build Manager's command line features.
Extending Build Manager capabilities with Ansible integration for automated HCL Domino application releases.
Automating Build Manager
The command line capabilities of Build Manager enable us to initiate releases without requiring a manual trigger. However, being able to use them with other CI/CD build tools like Ansible requires some further understanding.
On the workstation where you typically run your Build Manager promotions, you will find the file 'TeamstudioBuildManager.exe', which may be run from within the Notes executable directory along with various parameters to initiate your Build Manager promotions. We will refer to this workstation as the Build Manager host that Ansible will target to trigger your builds.
When invoked without any parameters, you are provided with documentation on what options are available. Not all are required, but in order to integrate external tools like Ansible, there are a few that you will need to use.

The minimum required parameters to run a simple promotion are the -promote command followed by parameters specifying the server and path of the Build Manager instance, and the Note ID or UNID of the promotion path to run. However, in situations where the HCL Notes client on the Build Manager host is expected to be closed during the initiation of the automated tasks, it becomes necessary to provide additional information. This includes the user ID credentials, the location of notes.ini, and the parameters for database promotion.
Let's look at an example command we could use to launch a preconfigured promotion path:

Example Build Path
Here we have an application ‘Example.nsf’ set up with a promotion path named 'DEV to TR" with any number of build steps within its pipeline. The promotion path is configured to target an environment within a Template Registry and originates from the development instance of Build Manager. A command to run a promotion based on the above might look something like this:
c:\HCL\notes\TeamstudioBuildManager.exe -promote
  -bm "TSDemo01!!CIAO\CIAOconfig.nsf"
  -srcdb "TSDemo01/Teamstudio!!CIAO\Example.nsf"
  -promopath "DEV to TR"
  -comment "Automated CLI Release"
  -id "C:\HCL\Notes\Data\user.id"
  -password "ExamplePWD"
  -i "C:\HCL\Notes\notes.ini"
When invoking the Build Manager executable with the -promote command above we stipulated:
-bm: Path to the Build Manager instance
-srcdb: Source database
-promopath: Name of the promotion path to run
-comment: Build comment to include in the release log
-id: Path to the Notes ID used to initialize the Notes session
-password: Notes ID Password
-i: Path to the Notes INI file to use
This then results in the targeted application being seamlessly deployed into the environment specified by the promotion path, guided by its pre-configured build steps.
While harnessing the power of Build Manager's command-line interface, it's important to note that certain limitations and constraints might apply, depending on specific use cases or environments. As such, gaining familiarity with Build Manager's documentation can be beneficial for navigating these potential restrictions and using the tool to its fullest potential.
Integrating Build Manager with Ansible
Now that we know how to automate Build Manager via the command-line, let's take it a step further by integrating it with Ansible. Ansible is an open-source software provisioning, configuration management, and application-deployment tool.
By integrating Build Manager with Ansible, we can make the process of deploying our HCL Domino applications alongside other deployments a seamless one.
To do this, we'll need to create an Ansible playbook that includes the necessary commands to initiate a Build Manager promotion during the Ansible-based deployment and perform a few initial configurations to our Ansible setup.
Setup of Build Manager Host
With Ansible being an agentless tool, there is no need to install any special software or client on the Build Manager host, but a few things do need to be in place, given it is a Windows-based system.
For Windows specifically, Ansible requires PowerShell 3.0 or later and .NET Framework 4.0 or later to be installed on the Build Manager host. It uses WinRM (Windows Remote Management Service) as the connection method, which needs to be configured to allow Ansible to connect.
Here are the general steps you'd need to take to prepare your Build Manager host to work with Ansible:
Install PowerShell 3.0 or later and .NET Framework 4.0 or later.
Set up WinRM. Ansible provides a script for this purpose. You can download and execute it with the following commands:
# Run PowerShell as Administrator
# Download the script
$url = "https://raw.githubusercontent.com/ansible/ansible/devel/examples/
scripts/ConfigureRemotingForAnsible.ps1"
$file = "$env:temp\ConfigureRemotingForAnsible.ps1"
(New-Object -TypeName System.Net.WebClient).DownloadFile($url, $file)

# Execute the script
powershell.exe -ExecutionPolicy ByPass -File $file
This script configures WinRM to listen to HTTP requests on port 5985 and upgrades it to use PowerShell 3.0, which is necessary for Ansible's WinRM plugin.
Remember that while WinRM is encrypted by default, it's still a good idea to configure it to use HTTPS if you're communicating over untrusted networks. There are a number of authentication options and advanced configurations available with setting up the WinRM listener and service. It is recommended to become familiar with them by reviewing Ansible Windows setup guide.
Setup Ansible Controller
WinRM being the protocol used by Windows to communicate with the Ansible controller remotely, a few additional steps are needed to get things working correctly.
Ansible uses the Python library for Windows Remote Management package (pywinrm) to communicate with the Build Manager host via WinRM. You may install the module on your Ansible controller, depending on your version of Python, with something like the following:
pip install "pywinrm>=0.3.0"
If you are unsure of the version of the Python interpreter used by your Ansible controller, you may verify this by running:
ansible --version
Which will then display various details specific to your installation. For example, if you are using Python3, you may use 'Pip3' to perform the pywinrm installation. It is important to note that you need to install the module into the same Python interpreter used by Ansible for things to work correctly.

In this example Ansible is using Python 3.11.2
Configure the Ansible Inventory File
Next, we will need to add the Build Manager host to your Ansible inventory file (e.g., hosts.ini) with the details of your Windows host. Here's an example:
[windows]
buildmanager ansible_host=192.168.1.10

[windows:vars]
ansible_user=Administrator
ansible_password=your_password
ansible_connection=winrm
ansible_winrm_server_cert_validation=ignore
Here we set the hostname we will reference from the playbook, the IP address for your Build Manager host, and its appropriate Windows connection variables. Set the user and password fields to those required by your Build Manager host. Note that this is not your Notes ID-related details but usually a local admin account preconfigured on your Build Manager host. You may then save the inventory file, which you will later reference when we run the Ansible playbook.
Setup the Ansible Playbook
Finally, we will either add a new 'win_command' entry into our existing playbook that initiates the Build Manager Promotion path desired or create a new playbook specifically for this purpose.
Here is a basic example of what that YAML playbook entry might look like:
---
- name: Execute command on remote Build Manager host.
	hosts: buildmanager
	tasks:
	  - name: Run Build Command
            win_command: c:\HCL\notes\TeamstudioBuildManager.exe -promote
              -bm "TSDemo01!!CIAO\CIAOconfig.nsf"
              -srcdb "TSDemo01/Teamstudio!!CIAO\Example.nsf"
              -promopath "DEV to TR"
              -comment "Automated CLI Release"
              -id "C:\HCL\Notes\Data\user.id"
              -password "ExamplePWD"
              -i "C:\HCL\Notes\notes.ini"
In the above playbook, add the win_command with the constructed Build Manager command created based on your specific needs, as outlined earlier under Automating Build Manager.
Adding this task within any of your playbooks allows you to include automated HCL Domino application releases performed by Build Manager as part of your Ansible workflows.
Testing Connectivity to Build Manager Host
Once the Ansible controller and Build Manager host have been configured and your inventory file is set up, you can use the Ansible command-line tool to run the win_ping module against your Build Manager host to test the connection. Here's how to do it:
ansible windows -i hosts.ini -m win_ping
If everything is set up correctly, you should receive a SUCCESS message along with some additional information about the host. If there's a problem with the connection, Ansible will return an error message.

Example Success response.
Running a Promotion
Now that we have our Build Manager host and controller configured to communicate via WinRM and both our inventory and playbook files updated, we can launch the ansible deployment in the standard manner:
ansible-playbook -i hosts.ini playbook.yml
Thus using the ‘ansible-playbook’ command, we execute the defined tasks from our modified playbook from earlier, let’s call it ‘playbook.yml’. The playbook targets the Build Manager host we defined within the inventory file, in this case, a custom ‘hosts.ini’ file identified with the -i parameter.

Build Manager background promotion initiated from Ansible.
This example shows a simple Ansible setup for initiating an automated Build Manager promotion from within an Ansible deployment. You'll need to adapt it to your specific environment and requirements.
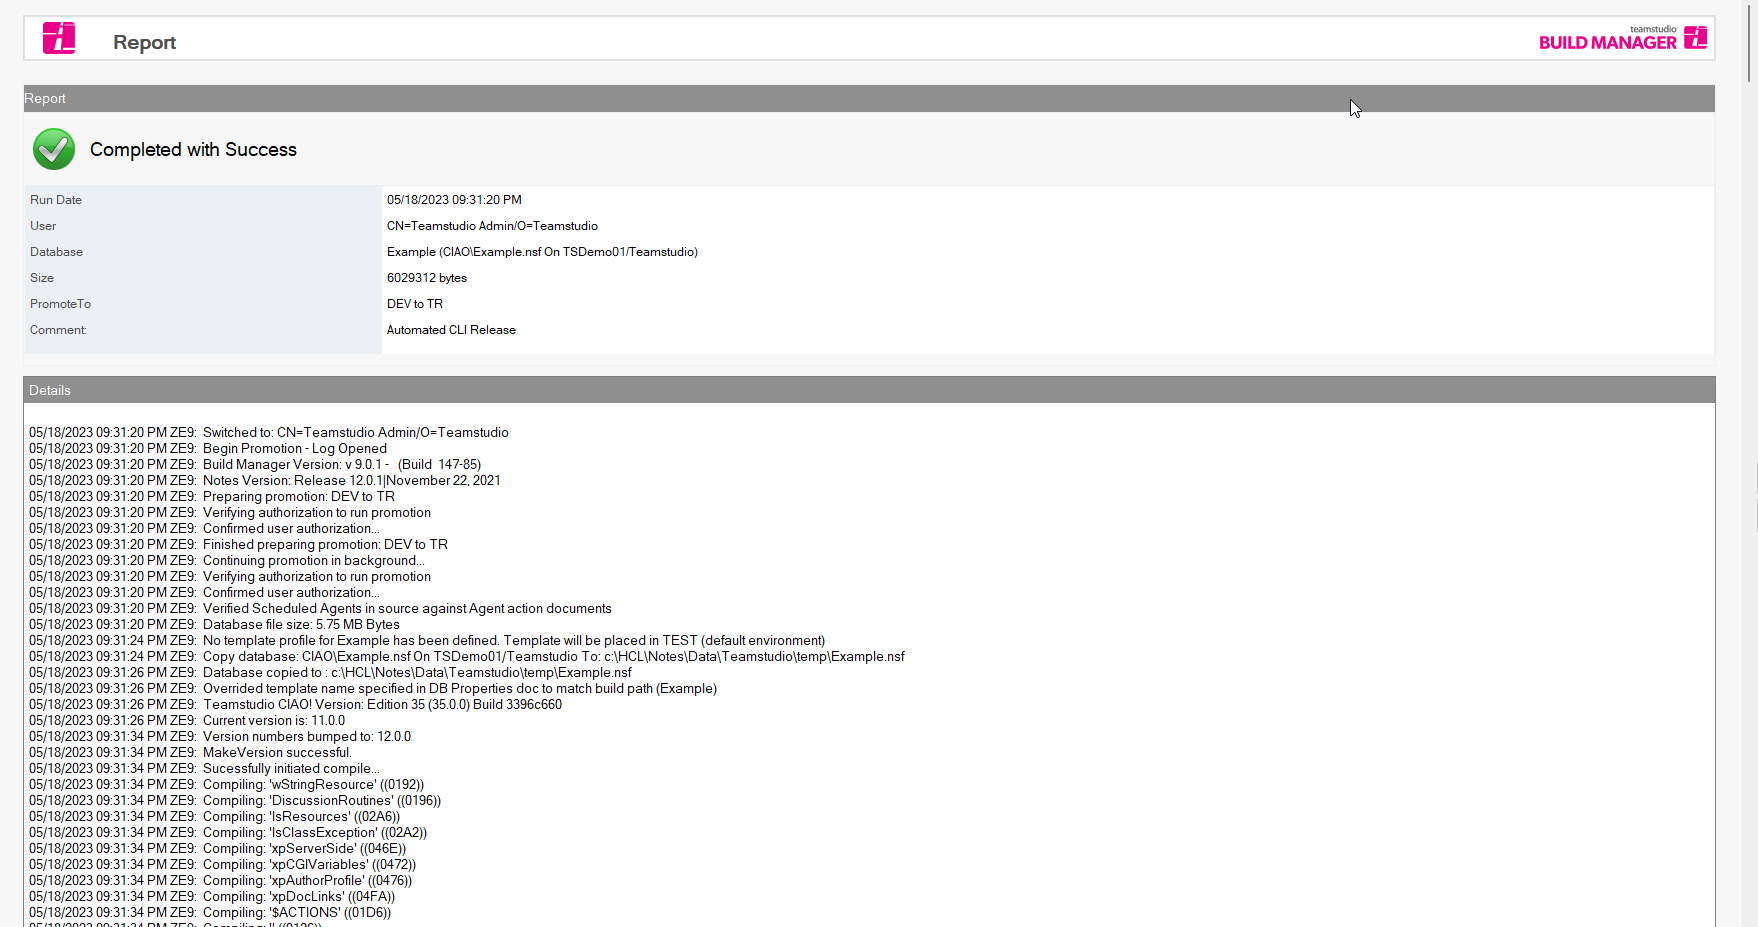
Build Manager promotion log initiated via Ansible.
And that’s it! By using the command line capabilities of Build Manager and the comprehensive configuration management provided by Ansible, we can streamline and simplify the deployment process of HCL Domino applications and their associated infrastructure.
Integrating Build Manager into Ansible, and other DevOps deployment tools helps enable the inclusion of a Domino release strategy alongside other technologies and frameworks that likely already exist within your business. Ultimately, this results in a more integrated and efficient deployment strategy, proving invaluable for businesses aiming to incorporate Domino application releases into their DevOps methodologies.
For any information on Build Manager feel free to refer to our product page or reach out to us with any questions.